Git for Beginners: Basics and Essential Commands (2/3)
…
The dependency didn’t last.
BitKeeper was no longer an option for Linux, previously called Freax.
At that point, the project had already outgrown patches, email, and centralized version control. Going back wasn’t possible
So Linus Torvalds, the developer behind Linux, did the only reasonable thing left.
He wrote a tool that solved the version control problems and called it Git
With this context, Git starts to make more sense. Its design centers on scalability rather than immediate intuitiveness.
Common Beginner Misconceptions
Before touching a single command, we need to clear a few ideas that almost everyone gets wrong when starting with Git.
- Git is GitHub
- Git != GitHub
- It “tracks changes” locally
- Git can have multiple remotes where you can store your repo
- GitHub is just a remote managed by Microsoft similar to GitLab and Bitbucket managed by other corps
- You can host your own remote using software like Forgejo, GitLab CE, Gitea
- Git automatically tracks my changes
- You explicitly tell Git to track certain files
- When you want to “save the current state”, you make a commit
- A commit is a backup
- Commits are just like a checkpoint which you create
- Commits are manually pushed to remote
- Branches are copies of folders
- Branches are just a pointer to a commit
- The commit a branch points to is called the tip of the branch
- Since branches are just pointers, creating them is cheap and fast
- This is why people say: “branches are cheap in Git”
Git Basics, Workflow and Essential Commands
What Git Calls a Repository?
A repository (often shortened to repo) is a project tracked by Git.
Essentially, it’s just a directory which contains your project files
But how does Git identify a git repo?
It is identified by a hidden .git directory
If a directory has a .git subdirectory inside it, Git considers it a repository.
The files you edit live in the working directory. The history and metadata live inside the aforementioned .git subdirectory
Most Git commands are simply moving changes between these two spaces.
Git Config
Git uses configuration files to record who made a change and when
OR in more technically correct words:
Git uses configuration files to determine the author identity and timestamps recorded in commits.
Well, where is this config file?
There are a multitude of config files which Git looks for by default. Each config file has a Scope or Level.
These levels decide where a setting applies and which setting wins if there is a conflict.
| Scope | Location | Applies to |
|---|---|---|
| System | /etc/gitconfig | Every User |
| Global | ~/.gitconfig | Current User |
| Local | .git/config | Specific Repo |
| Worktree | .git/config.worktree | Worktree Specific |
This neat diagram by Boot.dev explains really well which config file overrides which one:  Credit: Boot.dev
You don’t need to think much about the Git config file at this point of time. Most of the time you are going to use the Global config file
Substitute the e-mail and username with your own and run these commands to setup a basic Git config
1
2
git config --global user.email "your-email@example.com"
git config --global user.name "Your Name"
Workflow
At a high level, Git workflow looks something like this:
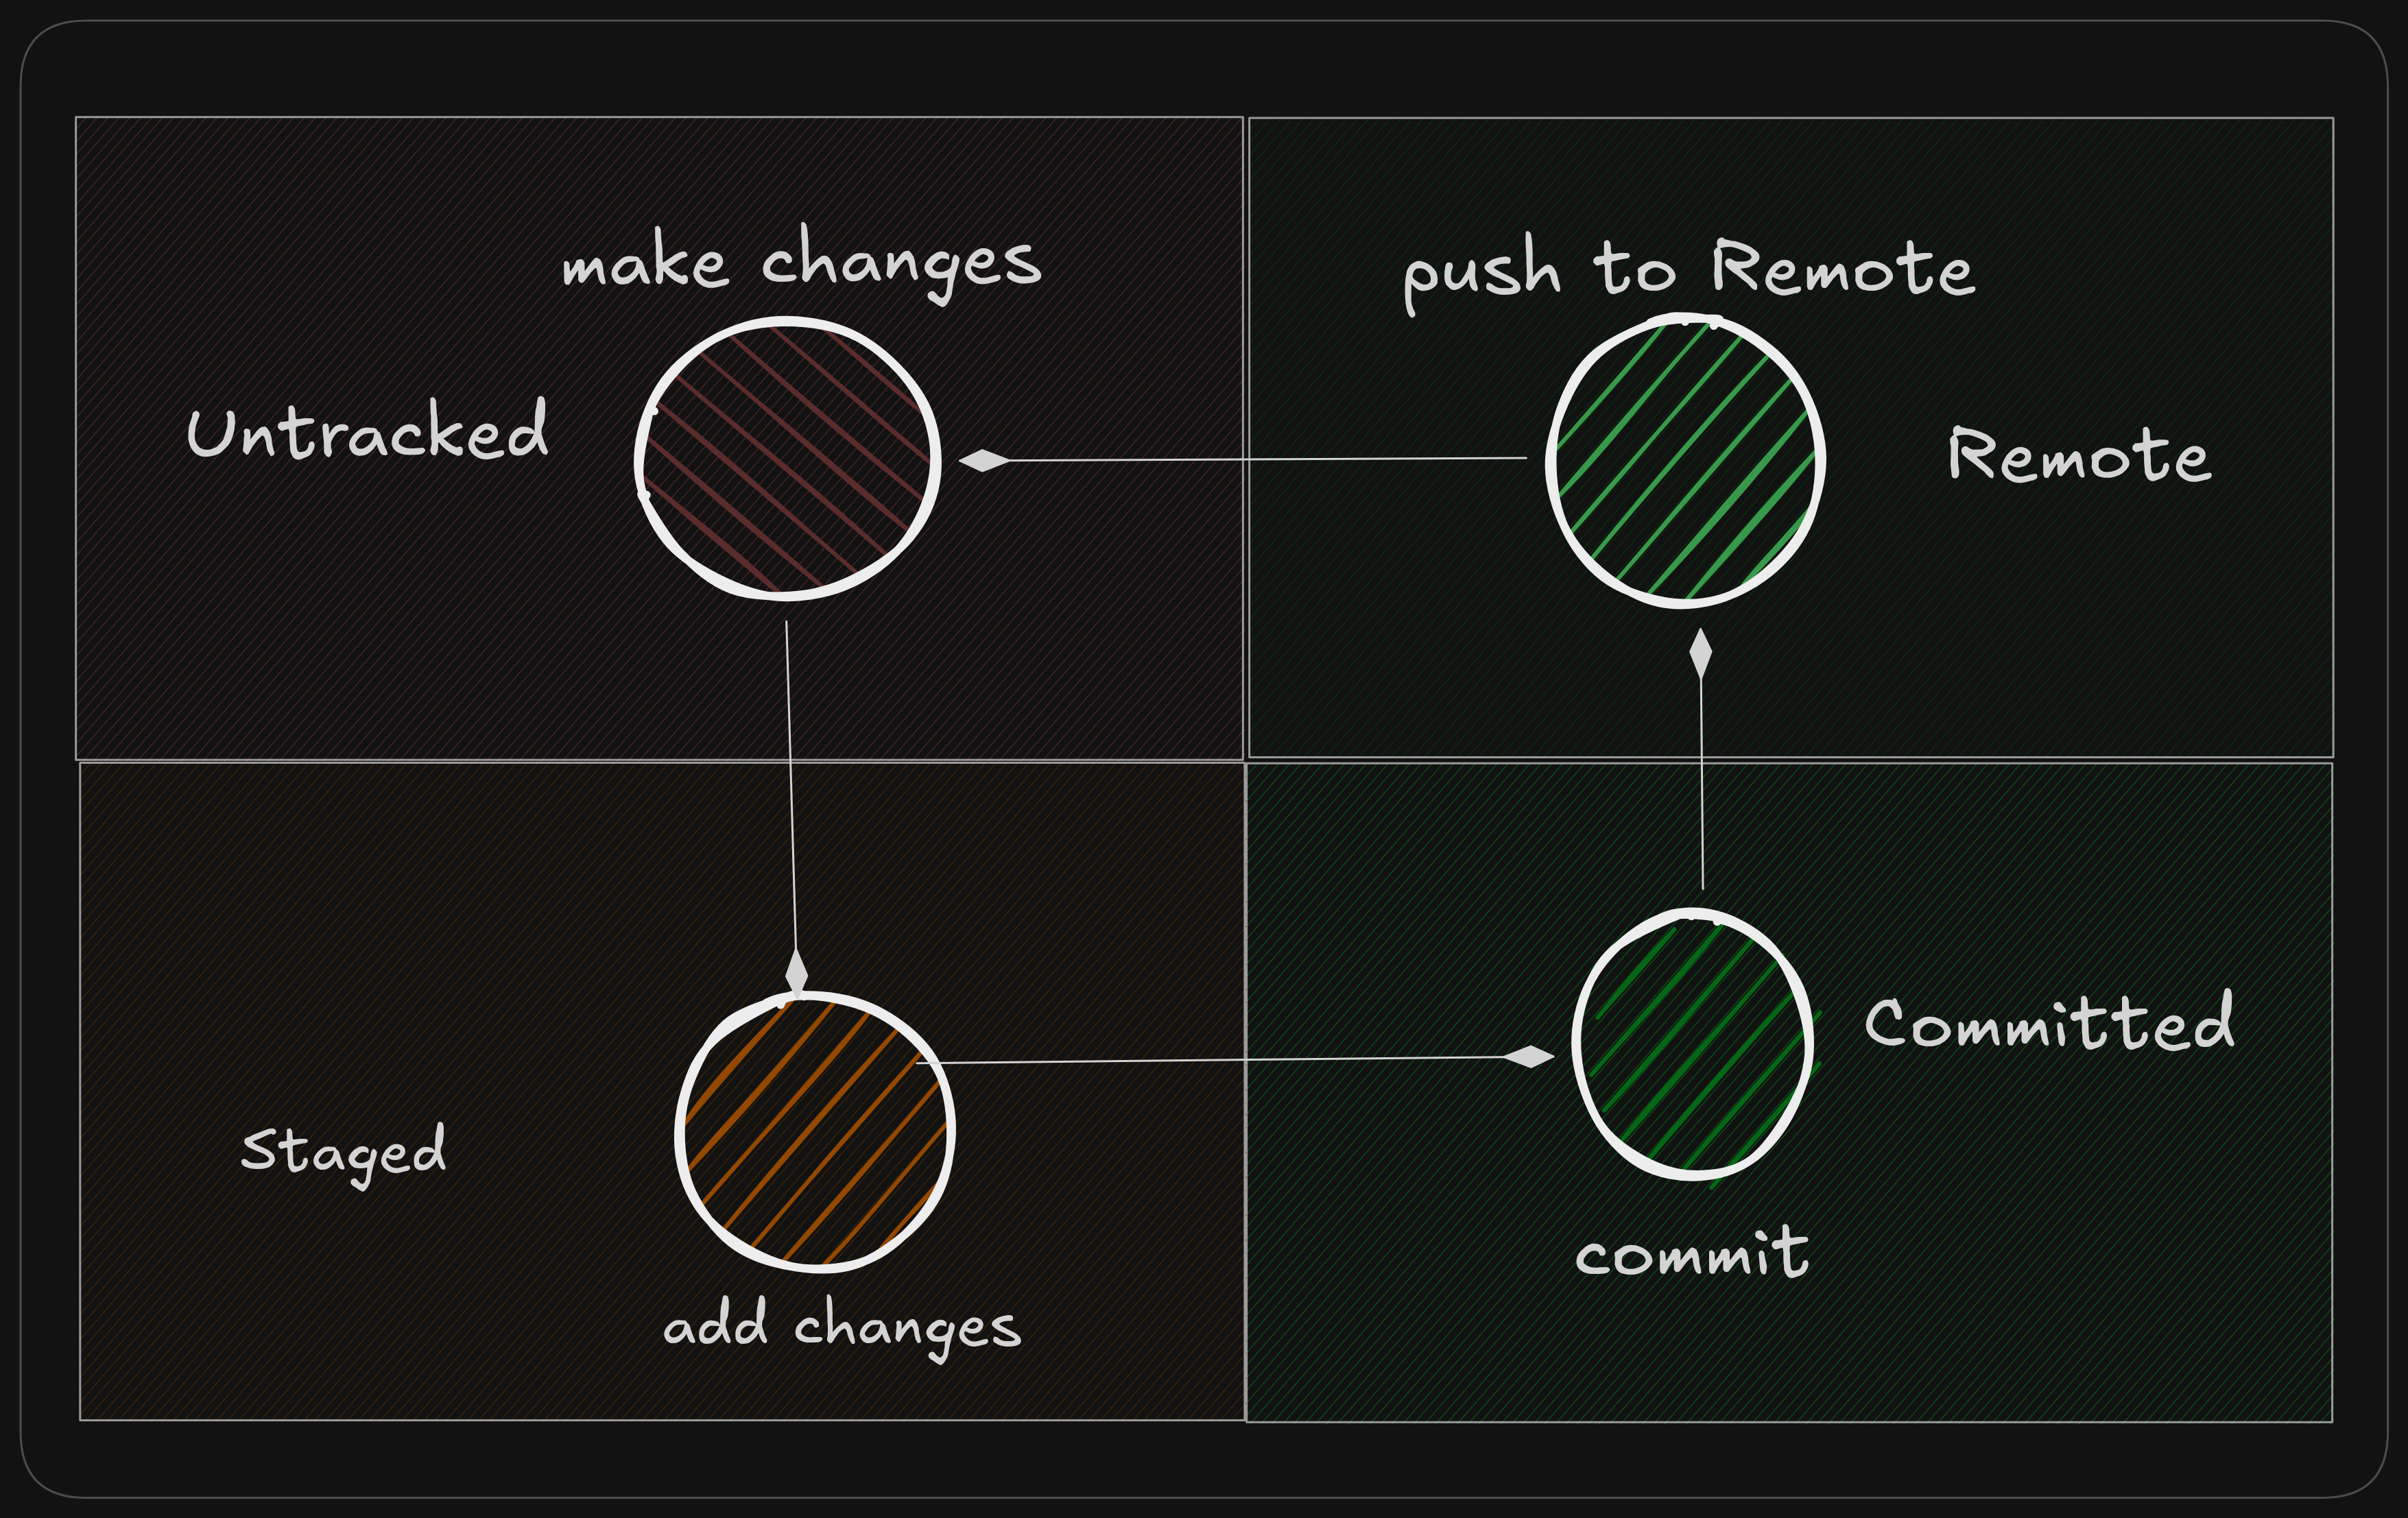
We’ll walk through this loop step by step.
Working Directory
This is where you edit your files, compile, run and test your project BUT at this point it’s just a simple directory. Git has no idea that it even exists.
To start using this working directory as a Git repo, we need to initialize it with Git
1
git init
This create .git directory in your working directory. At this point Git is NOT tracking any files, it simply exists there ready to be commanded!
Check the Current State
Make it a habit to run this whenever you start working in a Git repo
1
git status
Running git status gives us an overview of what Git sees. A file in a Git repo can have three states:
- Untracked: Not tracked by Git
- Staged: File is tracked by Git and will be included in next commit
- Committed: Saved to repo history
Staged files are said to be in “Staging Area” also referred as the “Index”
git status also gives you an overview of which files have changed in the repo. Using this information we can move onto the next step
Choosing What Belongs Together
Good News! You don’t need to record all the changes across files in a single go.
We can add the desired files by specifying file names either one-by-one, by-directory, or glob patterns.
These files will be added to the staging area
1
git add file.md
To add all standard files and directories in current working directory, do
git add .
Recording a Snapshot
Once you’re satisfied with what you’ve selected, you record it.
1
git commit -m "Describe what changed"
This creates a commit in our Git history.
A commit is associated with a long, unique identifier that represents the commit’s contents and metadata called a Hash.
Commit hash is derived using various sources such as:
- content changes
- commit message
- Author Name
- Author e-mail
- Date and Time
- Parent commit hash
If any of these change, the resulting hash changes as well.
Viewing History
To perform any operation on or using our history, we need to first be able to see what happened in the past. Git log command allows us to do just that
1
git log
This shows you:
- List of commits
- Commit messages
- Authors
- Order in which commits were made (or reverted)
If you just want to see the commit hash and commit message, you can run
git log --oneline
Conclusion
At this stage, you know how to work with git and these are the commands which Developers and DevOps creatures use majority of the time.
If you’re stuck with git, try this site
In the next post we’ll look inside the .git directory and answer questions like:
- Where commits actually live
- What branches really point to
- How Git stores history on disk
Understanding that internal structure is how you become the Git Master!